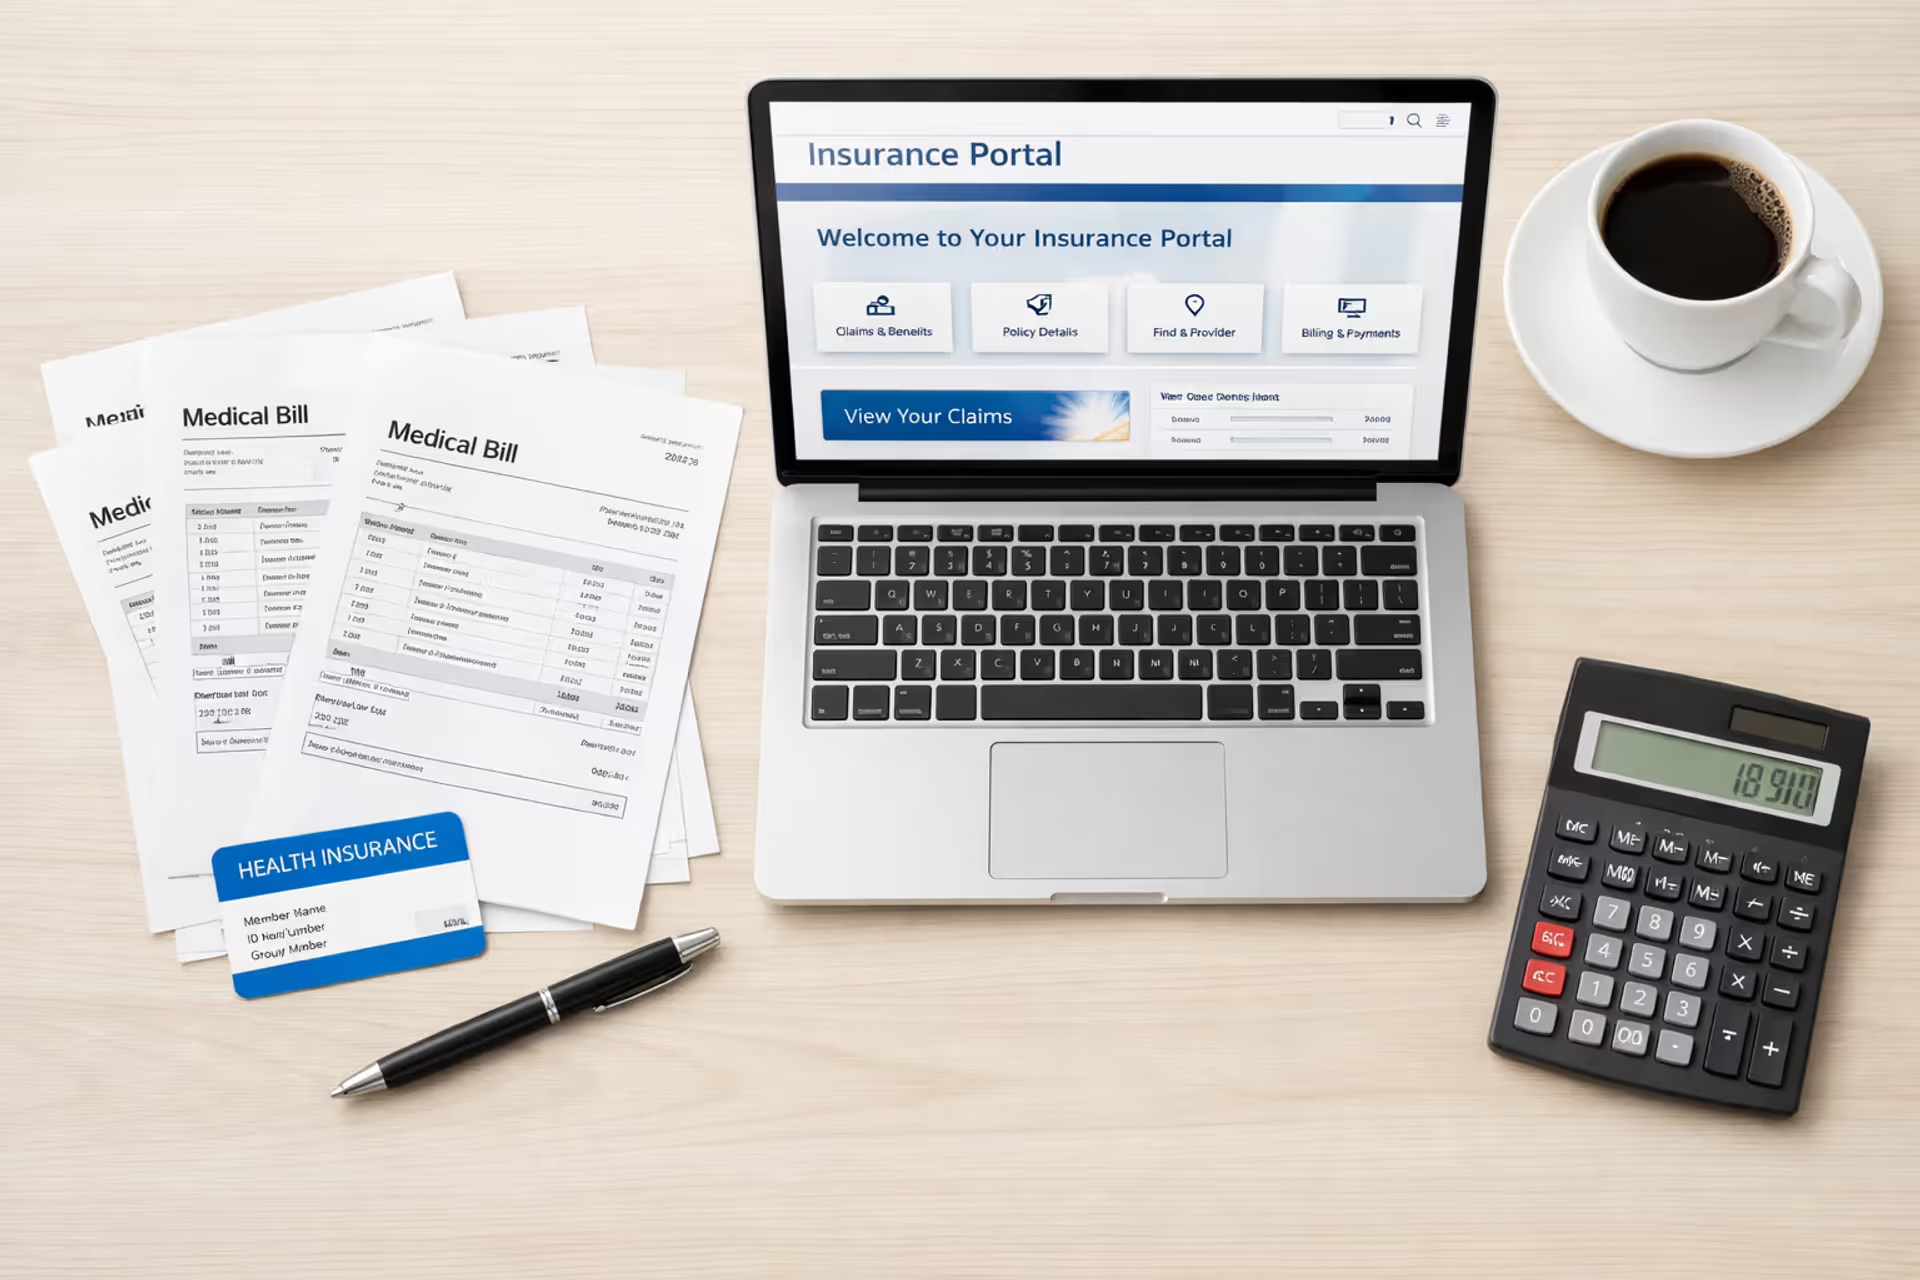

Top view of a desk with health insurance claim form, medical receipts, insurance card, pen, and calculator, person's hand ready to fill out paperwork
How to File a Health Insurance Claim in 5 Steps

Content
Remember that moment when you left the dentist's office clutching a $400 receipt and heard "Sorry, we're out of network—you'll need to handle the insurance yourself"? My stomach dropped when it happened to me three years ago. I had zero clue what to do next.
Most medical visits flow smoothly. You flash your insurance card, settle your copay, and forget about it. Your doctor's billing team handles everything else invisibly. Then one day you need urgent care during a road trip, or you choose a specialist who demands upfront payment. Suddenly, you're staring at forms, mysterious codes, and deadlines you've never encountered.
Here's what nobody tells you: roughly three in ten Americans will personally submit a health insurance claim within the next twelve months. Maybe vacation brings an unexpected illness. Perhaps your preferred specialist operates outside your network. Or you might purchase prescribed medical equipment from a supplier that doesn't process insurance claims.
Understanding this process before crisis strikes changes everything. What looks impossibly complex becomes straightforward when you know the system.
I'm breaking down the complete process—every document that matters, each step in the right order, and the errors that trigger automatic rejections.
When You Need to File a Health Insurance Claim
Your recent doctor visits probably followed the same pattern. Check-in, present insurance card, pay your copayment, leave. Someone in the back office handled submission while you returned to your regular life. In-network providers manage this automatically.
Life complicates things. Specific circumstances require you to personally navigate how to file a health insurance claim explained through actual situations people encounter.
Providers outside your network generate most filing requirements. Imagine needing a dermatologist for a persistent skin issue. The closest specialist with earliest availability doesn't participate in your insurance plan. They ask for $225 upfront per visit, then provide detailed documentation. That paperwork becomes your reimbursement tool, letting you recover partial costs based on out-of-network coverage.
Emergency situations ignore network concerns completely. Nobody checks provider directories while experiencing chest pain at midnight. You reach the nearest emergency department immediately—exactly as you should. Though federal regulations mandate emergency coverage at in-network rates, certain facilities still require patients to manage paperwork for insurers they don't directly partner with.
Direct-pay medical offices increasingly avoid insurance entirely. Growing numbers of physicians operate cash-only practices, receiving direct payment from patients who then seek their own reimbursement. You receive treatment, compensate the practice immediately, then pursue insurance recovery independently.
Medical equipment and devices create frequent gaps. Your physician prescribes compression stockings or a blood pressure monitor. You purchase these from a medical retailer that avoids insurance billing. Now you're holding a receipt for $175 wondering about next steps.
Prescription complications arise regularly. Perhaps you forgot your insurance information and paid cash. Maybe you filled prescriptions while abroad. These medication expenses might qualify for reimbursement through proper filing.

Author: Ethan Bradford;
Source: blaverry.com
What You Need Before Filing Your Claim
I discovered this truth through painful experience: beginning claims before gathering everything necessary guarantees frustration. You'll reach the middle of your form, realize critical information is missing, and abandon the process. Later, you won't remember your progress.
Successful how to file a health insurance claim guide begins with preparation—boring but absolutely essential.
Grab a folder (I dedicate one large envelope per claim). You're becoming a temporary documentation specialist.
Information Your Insurer Will Ask For
Insurance carriers require particular data elements. Omitting just one can delay processing for weeks:
Policy identification: Your member card contains vital numbers. Locate your member identification, group number from employer plans, and the complete legal name of whoever holds the policy. For coverage through a spouse or parent, their details belong in the policyholder section rather than yours.
Patient details: Complete legal name including middle initial, date of birth, current residential address, and connection to the policyholder. When your nickname differs from your insurance card name, always use the legal version throughout all documentation.
Provider identification: This section confuses many people. You need the complete business name of the doctor or facility, physical practice location, tax identification number, and National Provider Identifier number (NPI). Your itemized receipt should contain all these details. Missing information? Contact the provider's billing staff directly and request it.
Service specifics: Precise dates of treatment, diagnostic codes (alphanumeric combinations like M79.604), procedural codes (typically five digits like 97110), and clear descriptions of services received. Never estimate or guess—copy these exactly from provider documentation.
Payment verification: Documentation proving you actually paid matters critically. Credit card statements qualify, canceled checks work, stamped receipts suffice. Believing you paid cash? Insufficient without proof.
Common Documents to Gather
Build yourself a checklist. I print physical lists and mark boxes while collecting items:
Current claim form: Each insurer maintains unique versions. Visit your carrier's website, locate "Forms" or "Claims" sections, then download today's "Medical Claim Form" or "Reimbursement Request." Never reuse old forms saved on your computer. Carriers update requirements regularly, and outdated forms trigger automatic rejection.
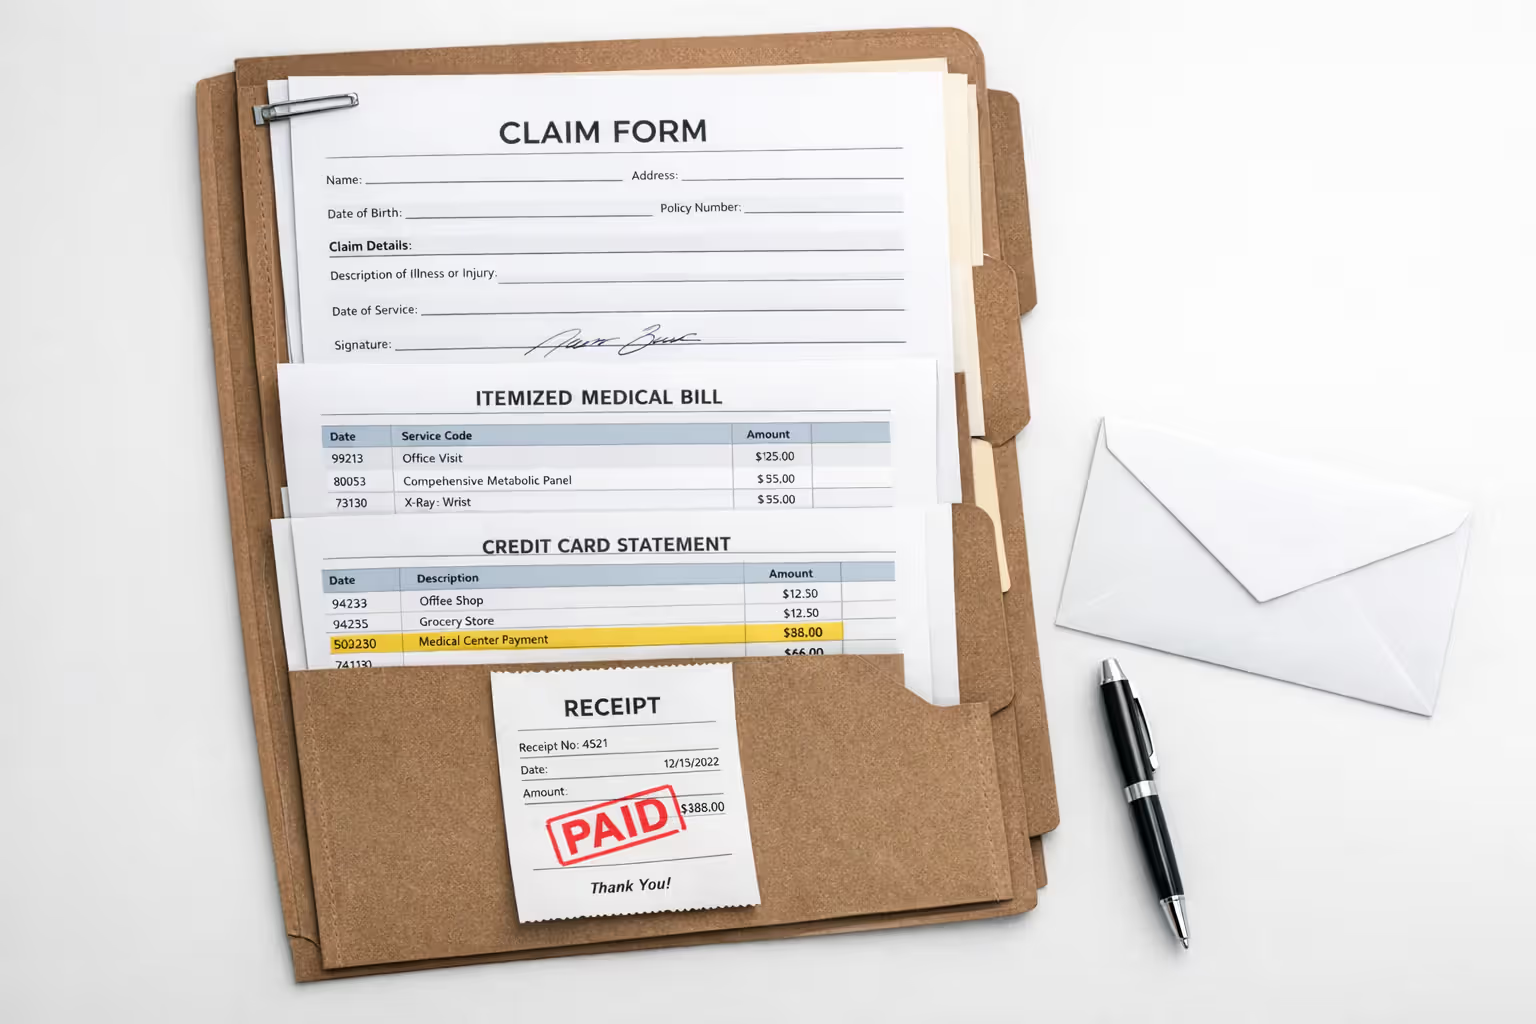
Itemized billing documentation: This trips up countless people. A credit card receipt stating "$300 - Medical Care" provides zero value for claims. You need itemized, coded statements breaking down each charge with corresponding diagnostic and procedural codes. Request this specifically: "I need an itemized superbill containing all diagnosis and procedure codes for insurance purposes."
Medical justification records: Insurers sometimes require understanding why specific treatment was necessary, particularly for expensive services or equipment. A physician letter on professional letterhead explaining medical reasoning significantly strengthens claims. Though not universally required, it helps questionable situations.
Pre-authorization records: Did your insurance mandate approval before receiving care? If so, find the authorization reference number and include paperwork proving approval preceded your treatment.
Payment evidence: Attach credit card statement copies highlighting the charge, photocopies of canceled check fronts and backs, or receipts marked "PAID IN FULL."
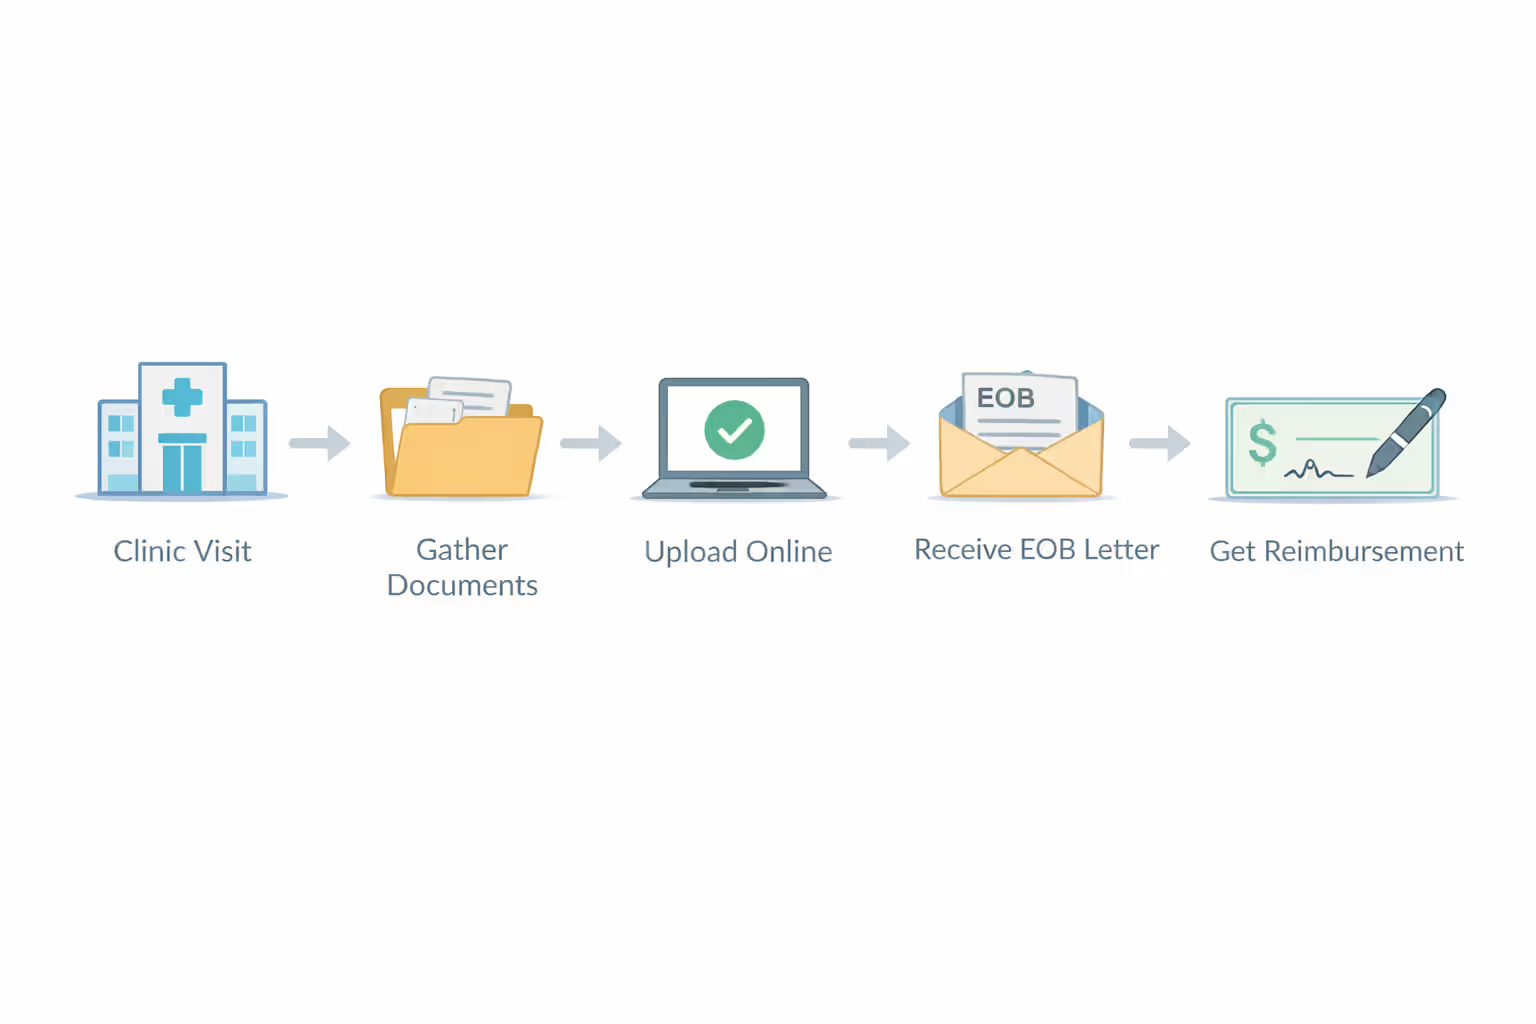
Step-by-Step Process to Submit Your Claim
You've assembled your documentation mountain. What happens next? These how to file a health insurance claim steps create your roadmap.
Step 1: Obtain the appropriate form
Access your insurer's member portal online. Search for "Forms," "Claims," or "File a Claim" areas. You might encounter separate forms for medical, dental, vision, or pharmacy claims. Select the correct option for your situation. Uncertain which applies? The customer service number on your card can guide you. Download it, then save with a descriptive filename like "Aetna_Medical_Claim_March2026.pdf" for easy future reference.
Step 2: Fill every field with meticulous accuracy
I complete fillable PDFs directly on my computer. Otherwise, I print and use black ink with deliberate handwriting. Seems excessive? Claims processors examine hundreds daily. Unclear information means instant rejection.
Progress through systematically. Your daughter's name belongs in the patient section when filing for her—not yours. Provider details must precisely match your itemized documentation. When your bill reads "Jefferson Medical Group LLC," duplicate that exactly instead of writing "Dr. Jefferson."
Service dates require precision. Multiple appointments might need separate forms or detailed attachments. Study the form's multi-date instructions carefully.
Verify signature requirements. Most demand patient (or guardian) signatures, sometimes provider signatures too. Missing signatures void claims immediately.
Step 3: Arrange and attach documentation
Think like you're building evidence. Position your completed form first. Behind it, attach itemized billing statements. Multiple receipts? Number them in upper corners (1 of 4, 2 of 4, etc.) and reference on your form.
Choose staples over paper clips. Clips detach during mail processing. Photocopy everything before submission. Never mail originals unless forms explicitly demand them.
Author: Ethan Bradford;
Source: blaverry.com
Step 4: Select your submission approach wisely
Major insurers now accept digital filing through member portals—processing noticeably faster. I've watched online submissions acknowledged within one day versus mailed claims taking a week reaching the system.
For online submission, log into your account, navigate to "Submit a Claim" or "Upload Documents," then follow instructions. Capture clear photographs or produce sharp scans. Fuzzy images face rejection like illegible writing.
When mailing becomes necessary, confirm the submission address printed on claim forms—typically different from general correspondence addresses. For substantial claims worth hundreds of dollars, I select certified mail with tracking. The modest extra cost creates permanent proof the insurer received your package if they later dispute delivery.
Step 5: Confirm receipt and maintain records
Here's a repeated mistake: people submit then forget. Within three business days for digital submissions (seven for mail), verify receipt. Call customer service asking: "I submitted a claim on
. Can you confirm system receipt and provide a claim reference number?"Document that reference number. Note your call date. Record the representative's name. Store this information with claim copies. When following up in two weeks, you'll have everything needed for quick reference.
Common Mistakes That Delay or Deny Claims
Want how to file a health insurance claim tips learned from thousands of rejections? Sidestep these errors that derail legitimate submissions.
Missing information destroys claims immediately. I've examined denials where a single blank field triggered rejection. The diagnosis code section was empty. Provider NPI wasn't included. Patients forgot signatures. Before sealing envelopes or clicking "submit," examine every field. When sections don't apply, write "N/A" instead of leaving blank.
Coding discrepancies create instant problems. Your form lists S83.511A (sprained right knee ligament), but attached receipts show S83.512A (sprained left knee ligament). Single-digit variations get flagged. Processors verify codes on forms exactly match supporting documents. When uncertain, transcribe codes character-by-character from itemized bills.
Missed deadlines eliminate reimbursement eligibility. Examine your policy carefully. Most carriers allow between 90 days and one year from service dates for filing. Submitting past that window—even hours late—forfeits claims regardless of legitimacy. I maintain simple spreadsheets tracking service dates and filing cutoffs for any out-of-network treatment.
Resubmissions activate fraud detection. You're anxious. Three weeks passed without word, so you resubmit "for safety." Wrong approach. Automated systems flag duplicate claims as potential fraud. This slows processing as claims route for manual investigation. Submit once. Without timely responses, call checking status instead of resubmitting.
Outdated forms waste time. Carriers revise forms annually, sometimes more frequently. That claim form downloaded and stored on your desktop? Likely obsolete now. Old forms get automatically rejected because they lack new required fields or use discontinued coding systems. Always download fresh forms immediately before filing.
Low-quality images render documents illegible. When uploading receipt photos or scans, lighting quality matters tremendously. Photograph in bright light, frame entire documents, and verify all text appears sharp and readable before uploading. Unclear diagnosis codes or faded provider information results in rejection.
Forgotten signatures seem obvious yet happen constantly. You spent twenty minutes carefully completing forms, attached all materials, and submitted. Three weeks later a letter arrives: "Claim denied - unsigned by patient." You overlooked the signature line. Both patients (or legal guardians) and sometimes providers must sign. Review signature requirements thoroughly.

Author: Ethan Bradford;
Source: blaverry.com
What Happens After You Submit a Claim
You've submitted everything and received confirmation. Now waiting begins. Understanding processing helps you recognize when to follow up, as explained in this how to file a health insurance claim guide to post-submission.
Processing duration depends on complexity. Straightforward reimbursement requests—out-of-network doctor visits where you paid upfront and submitted clean claims—typically process within two to three weeks. Complex situations involving expensive procedures, multiple providers, or uncommon services might extend to six through eight weeks. Your insurer should provide estimated processing windows when you confirm receipt.
During these weeks, claims adjusters review submissions. They verify services fall under covered policy benefits, confirm provider information legitimacy, ensure procedural codes align with diagnostic codes, and verify you haven't exceeded annual or lifetime benefit caps for that care category.
Explanations of Benefits arrive initially. People constantly confuse EOBs with bills. An EOB isn't a bill. You owe nothing on the EOB itself. It's a detailed insurance company statement explaining their claim decision.
Your EOB displays service dates, provider names, procedure codes, provider charges, plan-allowed amounts for those services, insurance payment amounts, and your remaining responsibility. It prominently includes your claim number at the top—preserve this number permanently.
Study your EOB carefully, especially "remarks" or "reason codes" areas. This explains insurer logic. Denials specify exactly why using standardized codes.
Payment or denial follows the EOB. Approved claims typically generate reimbursement 5-10 business days after EOB dates. Most carriers mail checks to policyholder addresses on file, though some offer direct deposit when configured in your account.
Payment amounts should match EOB indications. When your EOB shows $284.75 owed, your check should read $284.75. Mismatched amounts require immediate calls.
Partial approvals occur frequently with out-of-network claims. Perhaps providers charged $425, but your insurance considers $275 the "reasonable and customary" rate for that service in your area. Your plan covers 60% of allowed charges, paying $165. You're responsible for the remaining $260—$110 of the allowed amount plus the $150 difference between provider charges and insurance-allowed amounts.
Complete denials demand immediate attention. Never ignore them hoping they'll resolve themselves. EOBs explain precisely why—services not covered under policies, missed filing deadlines, incorrect provider information, insufficient documentation. This information determines whether appeals make sense.
How to Appeal a Denied Health Insurance Claim
Denials hurt. You followed every step, submitted carefully, and still faced rejection. Before accepting defeat, understand this: approximately one in five claims receives initial denial, yet roughly half of appealed denials get reversed. Your persistence creates outcomes.
These how to file a health insurance claim tips for appeals have recovered significant denied benefits for people who persisted.
Identify the exact denial reasoning. Review your EOB and locate denial reason codes. Frequent ones include "not medically necessary" (questioning whether you needed treatment), "non-covered service" (your policy specifically excludes this care type), "out-of-network provider" (you knew this beforehand, but benefits still disappointed), or "untimely filing" (you missed submission deadlines).
The specific reason shapes appeal approaches. You can't appeal legitimate policy exclusions, but you can absolutely challenge medical necessity determinations with proper documentation.
Gather evidence supporting your case. For medical necessity denials, obtain detailed letters from treating physicians explaining why this particular treatment was critical for your specific condition. Generic letters fail—you need specifics. Include test results, imaging reports, previously failed treatments, or medical literature supporting the approach.
When problems involve incorrect codes rather than coverage disputes, contact your provider's billing department directly. Sometimes straightforward corrections to procedural or diagnostic codes transform rejections into approvals. Request corrected documentation with accurate codes.
Compose a clear, factual appeal letter. Address it to the specific appeals department listed on your EOB. Avoid ranting. Skip emotional language. Stay direct and factual.
Begin with identification: "I am appealing the denial of claim dated for, policy number."
State your position: "This claim was incorrectly denied because . The service was medically necessary as documented by . My policy covers."
Attach supporting materials: physician letters, medical records, corrected billing statements, policy excerpts demonstrating coverage.
End with clear requests: "I request reversal of this denial and full coverage according to my policy benefits. Please contact me at) or(email) with questions or for additional information."
Respect appeal deadlines. Most carriers allow 180 days from denial dates to appeal, though some require appeals within 60 or 90 days. Check your EOB for specific deadlines. Don't delay—earlier appeals typically receive faster attention.
Understand escalation pathways. First-level appeal denial doesn't end your options. Most insurance carriers maintain multiple internal appeal levels. Exhaust these before pursuing external options.
After final internal denial, you can request independent external review by third-party organizations. This option applies to medical necessity denials. Reviewers maintain no insurance company connections and make binding decisions.
Your state insurance department also handles complaints about claim processing. File complaints if you believe your carrier is acting unfairly or violating state regulations.
For employer-provided insurance governed by ERISA (most job-based coverage), additional federal appeal rights exist. Document every interaction throughout—each phone conversation, every mailed letter, all submitted materials. This paper trail becomes critical when escalating to regulatory authorities.
Key Differences Between In-Network and Out-of-Network Claims
| Aspect | In-Network Providers | Out-of-Network Providers |
| Who Submits Claims | Provider's billing office handles all insurance paperwork directly | Patients generally manage reimbursement paperwork themselves |
| Required Paperwork | Billing staff manages forms; patients rarely interact with claims documentation | Patients collect all documents and complete claim forms personally |
| Payment Timing | Insurance processes first; patients pay only copayments or remaining deductible portions | Patients usually pay complete bills immediately, then await insurance reimbursement over several weeks |
| Your Financial Responsibility | Lower cost-sharing: copayments commonly $25-60, or 15-25% coinsurance following deductible | Significantly higher cost-sharing: typical coinsurance of 35-60%, plus possible balance billing for charges exceeding "allowed amounts" |
Real Example of Filing a Health Insurance Claim
Let me demonstrate how to file a health insurance claim example using a realistic scenario from someone I know personally.
Sarah suffered severe migraines during a business trip three hours from home. She visited an urgent care clinic near her hotel—clearly outside her insurance network. The clinic's payment policy required upfront payment: $340 total.
Sarah's smart initial move: Before leaving, she specifically asked reception, "I need itemized documentation with all diagnosis and procedure codes for insurance purposes." The receptionist printed detailed documentation showing diagnosis code G43.109 (migraine without aura), procedure codes 99214 (urgent care visit, moderate complexity) and J2250 (injection administration), plus 96372 (therapeutic injection). The paperwork included the provider's NPI and the clinic's tax ID.
First week home: Sarah logged into her UnitedHealthcare member portal and downloaded their current medical claim form. She also reviewed her benefits booklet, confirming her plan covered out-of-network urgent care at 65% of "reasonable and customary charges" after her deductible. She'd already satisfied her $1,200 deductible for the year.
Week one, day four: Sarah completed the claim form at home. She entered her member ID, group number, and personal information in patient sections. In provider sections, she copied the clinic's information precisely as it appeared on documentation—name, address, NPI, tax ID. She entered the service date (single date, straightforward). She transferred diagnostic and procedural codes from documentation to appropriate form boxes. She described services as "urgent care migraine treatment, including evaluation and therapeutic injection."
Sarah signed and dated the form. She photocopied everything—completed form, itemized documentation, and credit card statement showing the $340 charge.
Author: Ethan Bradford;
Source: blaverry.com
Week one, day five: Through her online portal, Sarah uploaded clear scans of her completed form and documentation. The system generated confirmation number UHC846291. She noted this number on paper copies and set calendar reminders to follow up in ten days.
Week two: Sarah called UnitedHealthcare member services: "I submitted claim UHC846291 on June 5th. Can you confirm system receipt?" The representative confirmed receipt and indicated typical processing takes 18 business days.
Week four: Sarah received an EOB by mail. UnitedHealthcare's "allowed amount" for her services totaled $285 (they considered clinic charges somewhat elevated for that region). At 65% coverage, they paid $185. Her check arrived seven days later.
Total out-of-pocket: $155 instead of $340. Time invested: approximately 50 minutes across a month. The reimbursement clearly justified the effort.
The mistake I witnessed most frequently during my career? Patients submitting basic payment receipts instead of properly itemized statements containing all medical codes. You cannot imagine how many denials could have been prevented. When paying for any medical service, refuse to leave that facility without obtaining a complete superbill. This document must contain every single diagnosis code, every procedure code, and all provider identification numbers. A simple receipt reading '$315 - Medical Services' provides literally zero usable information for processing your claim. You absolutely must have those specific codes. Always request this documentation at checkout, even when it means waiting several extra minutes for printing. Those minutes prevent weeks of frustrating communications trying to obtain missing information later
— Robert Chen
Frequently Asked Questions
Filing health insurance claims becomes easier through practice. Your first attempt feels like navigating bureaucratic chaos. The second time, you recognize the territory. By your third claim, the process feels routine.
Build productive habits now. Maintain a dedicated folder—physical or digital—for medical receipts and documentation. When receiving out-of-network care or paying for services upfront, immediately request itemized statements with diagnosis and procedure codes. Don't wait until you're ready to file weeks later; provider offices sometimes create obstacles for obtaining records retroactively.
Accept rejections calmly. Claims face denial for technical reasons constantly—missing signatures, transposed numbers, slightly incorrect codes. Most denials become fixable through appeals when you supply proper documentation. Persistence delivers results.
The reimbursement waiting in your policy justifies the effort. Filing proper claims might consume 30-60 minutes of focused work, but can recover hundreds or thousands of dollars in healthcare expenses. You've already purchased these benefits through premiums. You should absolutely use them.
With the framework outlined here, you're equipped to handle claim submissions confidently whenever necessary. Save this guide somewhere accessible. Next time you receive a medical receipt and hear "you'll need to file with your insurance," you'll know precisely what to do.